




How to Categorize Expenses in QuickBooks Online
You've opened QuickBooks Online to a bank feed full of payments you barely recognise. One supplier appears under several descriptions, a phone bill includes personal use, and a receipt covering software and office supplies sits as one unexplained line. Clicking a category may take seconds, but deciding whether that category is correct is the bookkeeping work.
For a UK business, expense categorisation is part of a wider evidence chain. The category must agree with the receipt, supplier, date, amount, VAT treatment, and business purpose. A clean process makes reconciliation easier and gives your accountant a ledger they can review without reconstructing every purchase from memory. It also helps you think clearly about irregular spending, alongside useful guidance on spending buckets for irregular income.
Why Accurate Categorization Matters for UK Businesses
A bank feed records movement of money. It doesn't explain what the payment bought, whether it was wholly for the business, or whether the VAT can be treated as recoverable. That distinction matters when you claim allowable business costs or prepare a VAT return.
HMRC guidance requires UK businesses to keep records of everything they buy and sell, including zero-rated, reduced-rate, and VAT-exempt items, as well as copies of invoices issued and received and the VAT on goods and services supplied and received. The practical implication is straightforward: a category label isn't enough. The receipt and transaction details need to support the treatment recorded in QuickBooks Online. HMRC-related QuickBooks guidance summarises this record-keeping context.
HMRC also states that VAT records should be retained for 6 years. That retention period means a rushed decision today can create a weak audit trail long after the original purchase has left your attention.
Practical rule: Treat every categorised transaction as a small evidence file, not just a line in a report.
Consider a freelancer who pays for a mobile contract used for client calls and personal browsing. Posting the entire amount to telephone expenses may make the monthly accounts look tidy, but it doesn't explain the business-use basis. A home-working purchase can create a similar issue, particularly where the business and private elements are inseparable on the receipt.
A reliable process therefore asks three questions:
- What was purchased? Confirm the supplier, date, description, and amount.
- Why was it purchased? Record the business purpose where the receipt alone doesn't make it clear.
- What treatment applies? Decide whether it belongs to one expense account, needs split lines, or requires separate professional review.
Accurate categories improve management reporting, but compliance is the stronger reason to get them right. The ledger should let someone else follow the path from bank payment to receipt to tax treatment without relying on your recollection.
Navigating the QuickBooks Online Bank Feed
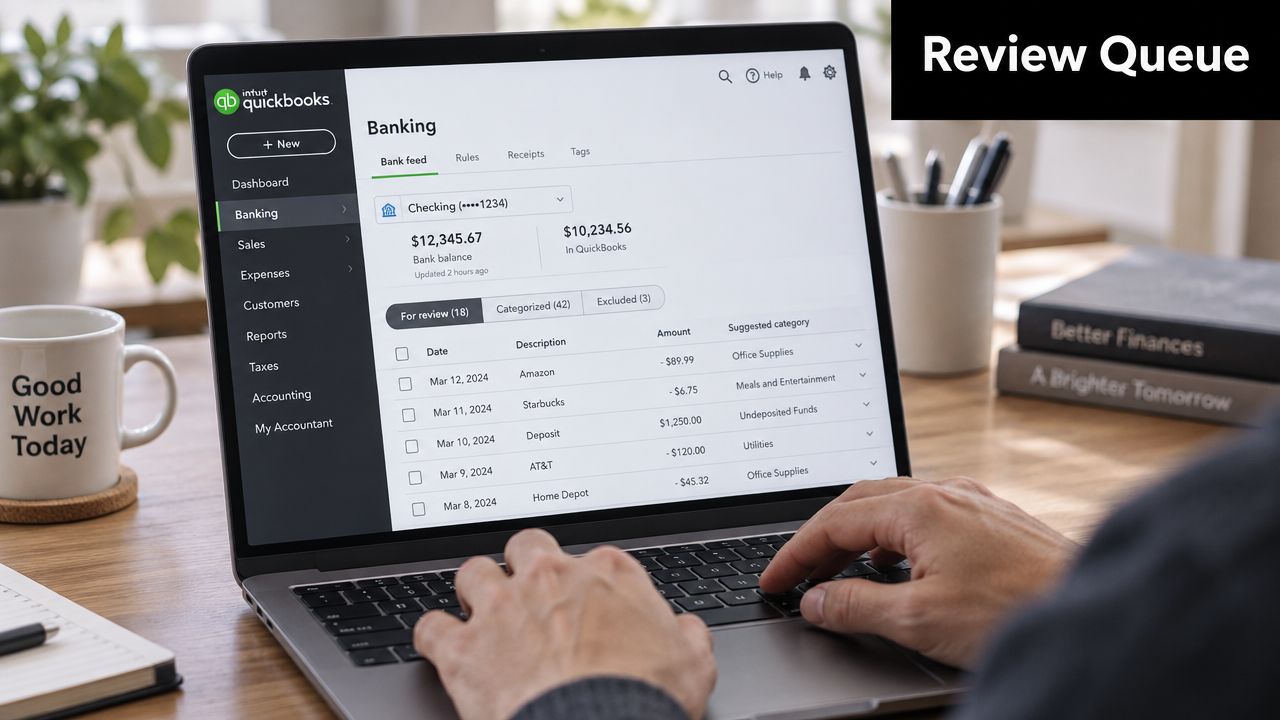
QuickBooks Online handles bank-fed expenses through the For Review queue. The suggested category is a starting point, not an approval. Review the transaction before adding it to the books.
Prepare the chart of accounts first
Before processing a long queue, open the chart of accounts and check that the accounts you need already exist. Common UK expense groups include office and premises, travel, professional services, marketing, IT and software, staff costs, financial costs, and consumables. QuickBooks' UK expense-recording guidance explains that the Category field assigns an expense to the relevant account.
A cluttered chart creates avoidable decisions. If you have several near-identical software accounts, users will apply them inconsistently and your reports will lose meaning. Keep the structure broad enough for useful reporting, but specific enough to distinguish different types of spending.
Review and add a straightforward transaction
For a bank-fed purchase, use this workflow:
- Open Transactions and select Bank transactions. Choose the relevant bank or card account.
- Open the For Review queue. Select a transaction and inspect the payee, date, amount, and suggested category.
- Compare it with the receipt. Don't approve a description that merely looks familiar. Check the actual document and VAT details where relevant.
- Confirm or change the Category field. Select the expense account that reflects the purchase.
- Add the transaction. Use Match instead when QuickBooks has identified an existing bill, invoice payment, or other recorded item. Adding a transaction that already exists can create a duplicate.
- Attach or retain the supporting document. The transaction should remain understandable during a later review.
The workflow is quick for a single-purpose purchase, such as a printer cartridge bought solely for the business. It becomes unreliable when the payment contains several products, personal use, or uncertain VAT treatment. Those transactions should stay in review until the evidence and allocation are clear.
Landlords and property businesses may need a more customized chart of accounts for property-related income and costs. A resource on QuickBooks for rental properties and landlords can help frame that broader setup, but don't copy a property chart blindly into an unrelated trade.
Handling Mixed and Partially Deductible Expenses
The hardest part of learning how to categorize expenses in QuickBooks Online isn't finding the dropdown. It's deciding what belongs in each line when one payment covers more than one purpose.
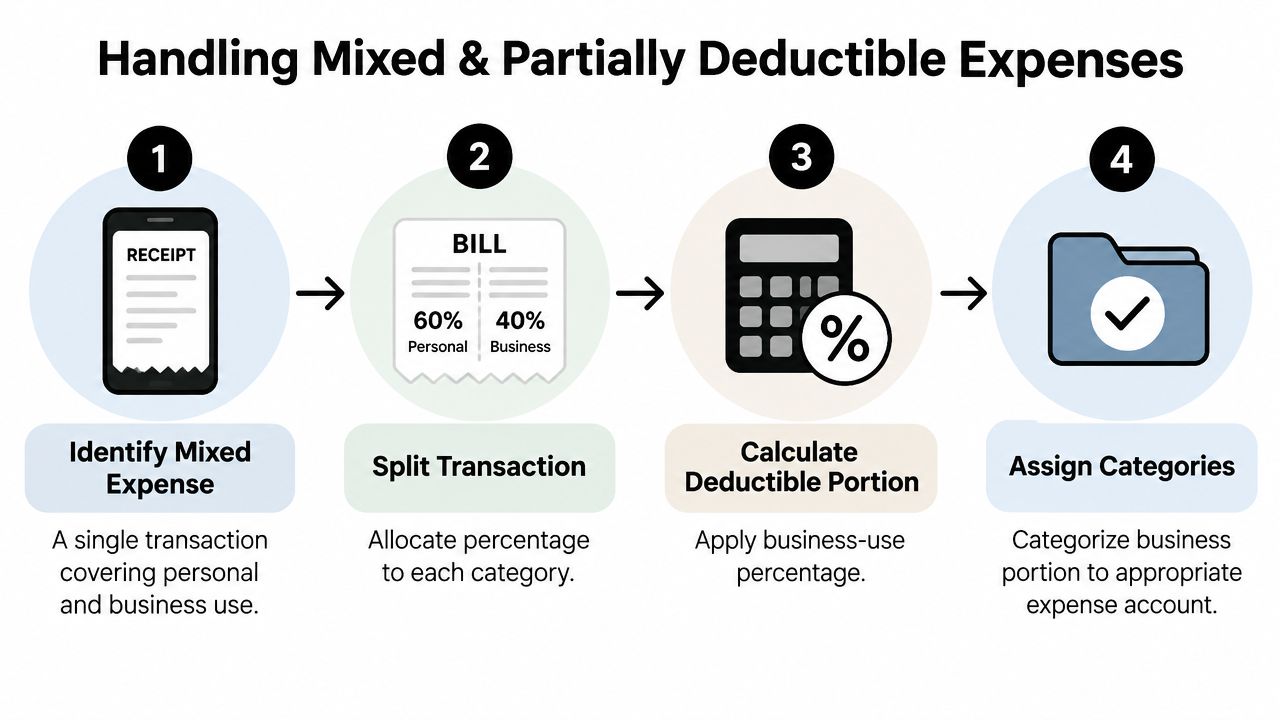
QuickBooks' UK guidance states that a transaction containing both business and personal use must be split. That principle applies to mobile phone bills, home-working costs, mixed travel, household purchases, and contractor expenses containing different types of work. QuickBooks' guidance on categorising and splitting online bank transactions is the relevant reference for the software workflow.
Separate the accounting decision from the tax decision
Start by identifying the components of the transaction. A receipt might include office consumables and a personal item, or a contractor invoice might combine design work with reimbursed travel. Create separate QuickBooks lines for the business categories, and record the personal element outside business expenses according to the way your accounts are structured.
Don't use a made-up allocation because it makes the total balance. The business portion should have a reasonable basis, such as an itemised receipt, a documented business-use method, or a calculation retained with the transaction. If the basis is unclear, pause and ask your accountant rather than treating uncertainty as full deductibility.
For home-working costs, consider whether a simplified expense method applies and whether the relevant evidence standard differs from an actual-cost claim. The key question isn't only “which category?” It is also “which tax treatment applies, and what supports it?”
Use split lines deliberately
In the bank transaction, choose the split option and assign each portion to its appropriate account. Check that the lines add back to the banked amount, then add a note explaining the allocation where a reviewer wouldn't understand it from the receipt.
A useful record might contain:
- Business category: The account receiving the allowable business portion.
- Personal or non-business element: The account or treatment used to keep it out of business deductions.
- Allocation note: The reason for the split and the basis used.
- Supporting document: The receipt, invoice, or calculation supporting the entry.
For VAT, don't assume that a business-use allocation automatically makes every VAT amount recoverable. VAT treatment depends on the nature of the supply, the documentation, and the applicable rules. If you need to assess a specific VAT amount, keep the categorisation decision alongside your calculation rather than relying on a later memory prompt. A related resource on a VAT deduction calculator may help with the calculation stage, but it doesn't replace checking the underlying evidence.
Automating Repetitive Transactions with Bank Rules
Bank rules work well when the transaction pattern is stable and the risk of misclassification is low. Regular software subscriptions, recurring supplier payments, and predictable professional retainers are reasonable candidates. A rule shouldn't be used to hide an uncertain transaction type.
Open the bank transactions area and create a rule from a transaction that represents the pattern accurately. Give the rule a clear name, select the bank or card account it applies to, and define conditions using information such as the payee or description. Assign the correct expense account, then review whether the rule should apply automatically or leave transactions for approval.
Build rules around reliable identifiers
A supplier name is usually stronger than a broad word in the payment description. A rule based on a specific merchant can be useful; a rule based on a generic term such as “payment” can capture unrelated transactions. Use amount conditions only when the recurring charge is consistent, because changing prices, credits, and renewals can otherwise send entries to the wrong category.
Before enabling automatic addition, test the rule against recent transactions. Look for:
- False matches: Other suppliers or purchases caught by the same condition.
- Missing matches: Variations in supplier descriptions that the rule won't recognise.
- Wrong VAT treatment: Transactions where the invoice evidence changes even though the supplier stays the same.
- Mixed purchases: A supplier that sometimes sells items belonging to different accounts.
The trade-off is clear. Automation reduces repetitive review, but an overly broad rule spreads one mistake across multiple transactions. Keep sensitive or variable spending in the For Review queue.
Review rules as the business changes
A rule that worked when you had one subscription may become unsuitable after the supplier adds a different service. Review your rules when you change suppliers, add staff, alter your services, or reorganise the chart of accounts. Bank rules should support a controlled process, not become a substitute for receipts.
The safest arrangement is to automate the boring, predictable entries and reserve human judgement for mixed use, unusual purchases, capital items, stock, and unclear VAT evidence.
Eliminating Manual Entry with AI Receipt Capture
Categorisation becomes much easier when the receipt arrives before the bank-feed transaction needs approval. Instead of seeing only a vague card payment, you can review a document containing the supplier, date, line items, tax, total, and likely category. That moves the difficult question upstream, where the purchase context is still visible.
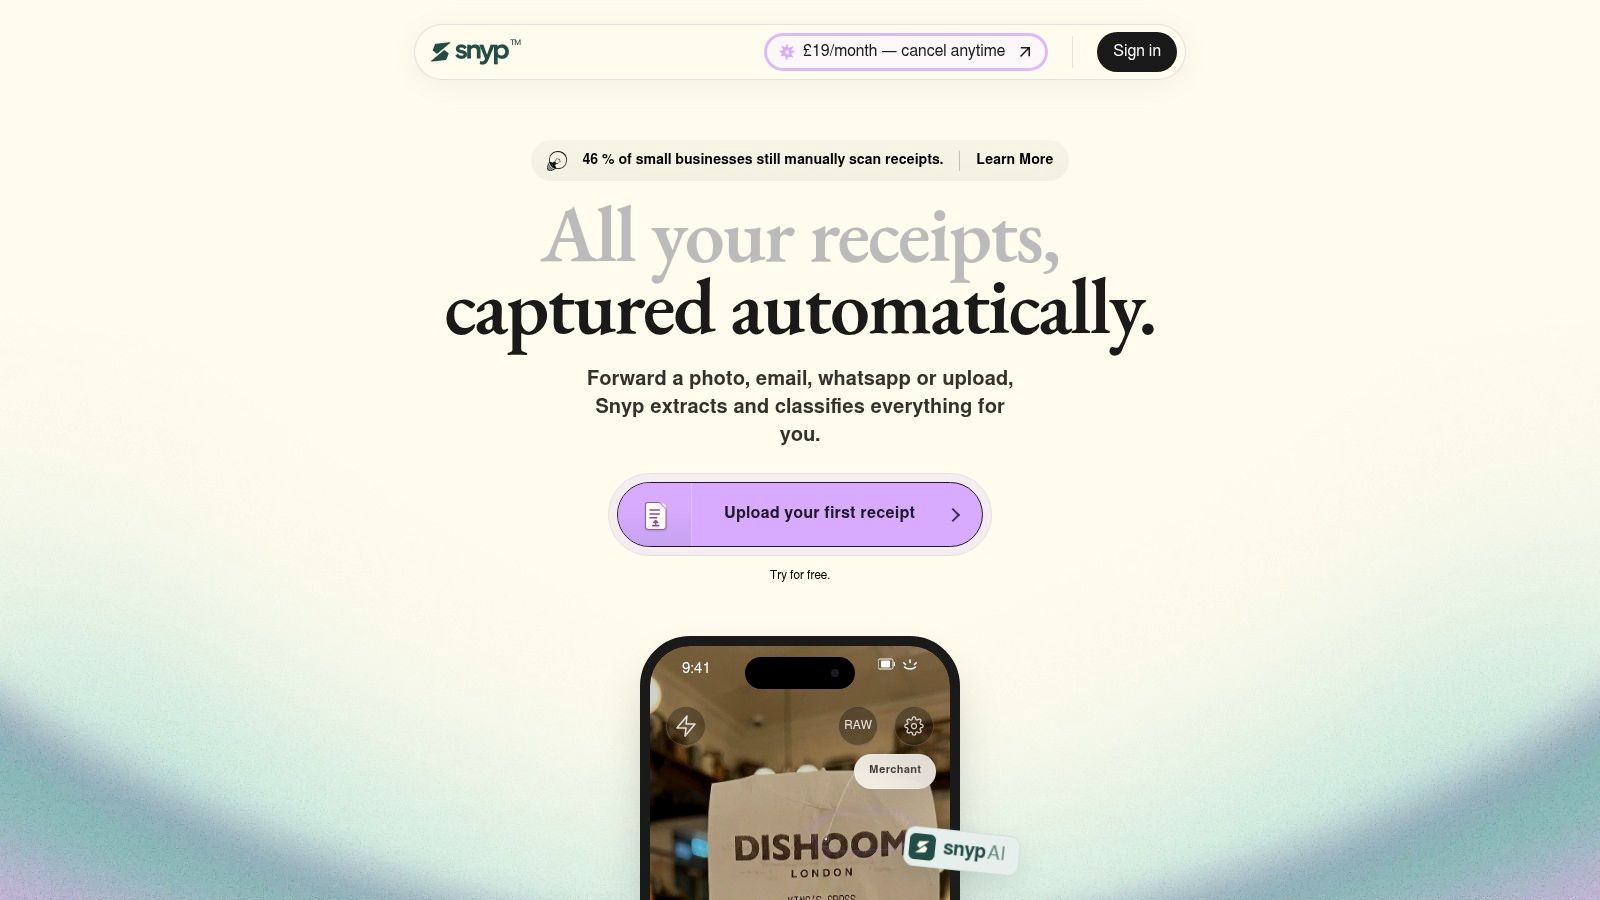
AI receipt capture can accept documents through channels such as email forwarding, messaging, or file upload, then extract key fields for review. The important distinction is between extracting text and understanding the transaction. A useful system should help identify the merchant and tax information, suggest a category that fits the QuickBooks chart of accounts, and preserve the source document for later checking.
That doesn't remove the bookkeeper's responsibility. A receipt engine may misread a faded image, misunderstand a mixed basket, or suggest an account that looks plausible but doesn't reflect the tax treatment. Use automation for data preparation, then approve exceptions with the same care you would apply to a manually entered receipt.
A structured receipt pipeline also reduces the gap between purchase and reconciliation. When the payment appears in the bank feed, the reviewer can look for a prepared record rather than asking the owner what the transaction was. This is the practical value of automatic data capture for expenses, particularly for people working away from a desk.
The following demonstration shows how receipt capture can fit into that workflow.
For UK records, retain the original evidence and check the extracted VAT amount against the document. A small purchase may be supported by a simplified invoice where the total is £250 including VAT, according to the UK receipt-management guidance from Business Reward Toolkit. Larger purchases generally need fuller invoice detail, so the software should not encourage a quick approval when the documentation is incomplete.
Building a Sustainable Monthly Reconciliation Habit
A reliable bookkeeping system depends less on heroic catch-up sessions and more on a repeatable review habit. Set a fixed date each month, capture receipts continuously, let narrow bank rules handle predictable payments, and reserve the review queue for transactions requiring judgement.
Use this sequence:
- Collect documents: Make sure receipts and invoices have reached your capture system.
- Check prepared data: Correct supplier, date, amount, VAT, and suggested category details.
- Review bank transactions: Match existing records, add valid new transactions, and leave unclear items pending.
- Resolve mixed expenses: Apply split lines and retain the reasoning behind each allocation.
- Reconcile the account: Compare QuickBooks with the relevant bank statement and investigate discrepancies rather than forcing a balance.
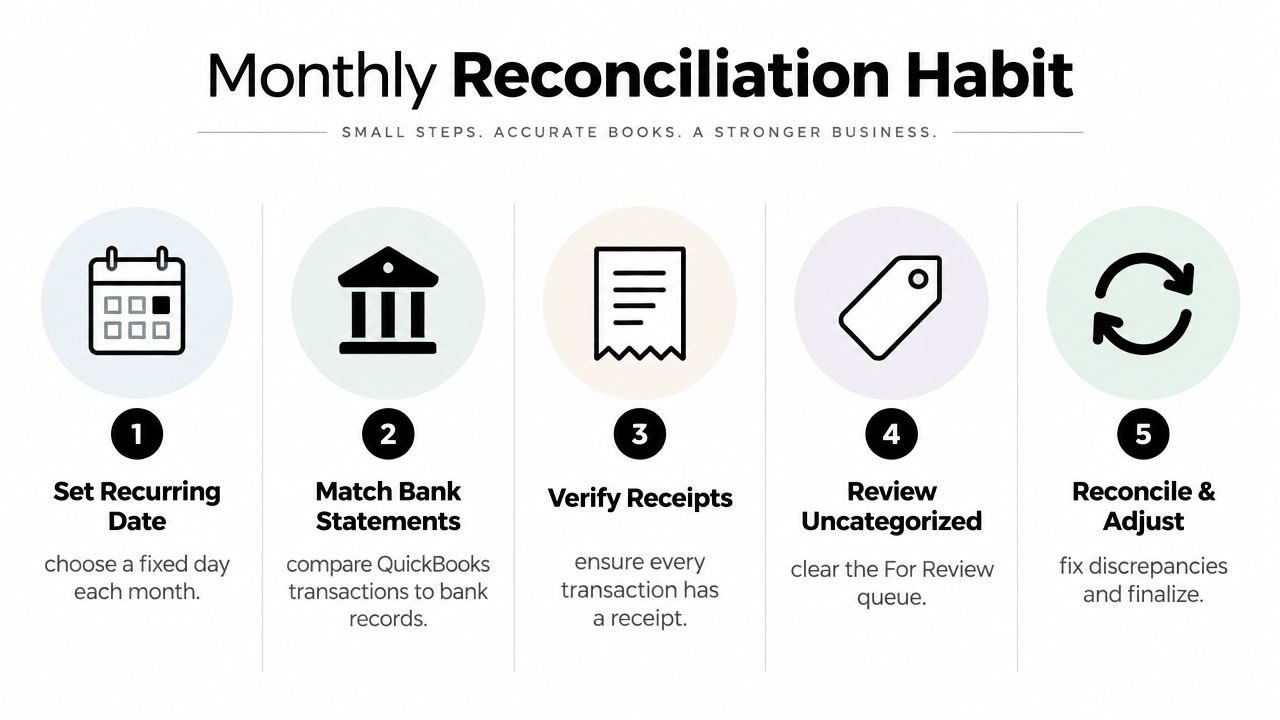
The monthly review should also include a scan for uncategorised items, duplicate entries, unusual suppliers, and transactions without supporting documents. Keep the chart of accounts stable unless there's a clear reporting reason to change it. If you need a more detailed process for comparing ledger activity with statements, use this guide to bank statement reconciliation.
The most effective approach is proactive approval. Capture evidence when the purchase happens, decide the category while the context is fresh, and use the bank feed as a control check rather than your primary source of information.
Snyp captures receipts from email, WhatsApp, and file uploads, extracts supplier, date, tax, currency, and category details, and syncs structured expense data with QuickBooks for review. Visit Snyp to see how it can help you replace end-of-period receipt chasing with a cleaner categorisation and reconciliation workflow.