




How to Import Bank Statement Xero Files Without Errors
You've downloaded the statement, opened Xero and realised the bank history doesn't join up. Perhaps the feed stopped, perhaps you're catching up an old account, or perhaps the client has sent a PDF when you need transaction rows. Uploading something quickly is tempting, but a file that imports successfully can still contain reversed payments, misplaced dates or duplicated entries.
To import a bank statement into Xero without errors, treat the upload as a controlled bookkeeping process. Establish the missing period, prepare a traceable file, test the mapping and prove the balances before you call the account finished.
Choose the Right Import Method for Your Statement
Say a client's HSBC feed stopped during March. Recent transactions are arriving again, but the missing activity hasn't appeared. Reconnecting the bank isn't proof that Xero now holds a complete history.
Choose the route according to the period you need, not just whether the account currently shows a connected feed.
Import routes and when to use each
| Method | When it fits | File format | Check first |
|---|---|---|---|
| Live bank feed | Bank is connected and history is complete | None needed | Gaps after reconnecting |
| Manual CSV upload | Bank unsupported, feed down or backfill needed | CSV | Date range overlap with earlier imports |
| PDF statement | Bank only offers PDF | PDF, converted to CSV | Each transaction on its own row after conversion |
| Historical backfill | Periods older than the feed's history window | CSV | Whether the feed can reach back that far |
| Card account with pending items | Card transactions not yet settled | CSV | Import settled entries only to avoid double counting |
Choose by coverage, not connection status
Xero's UK feed guidance says re-authentication may provide only 90 days of historical transactions, so older gaps can require a manual import alongside the automated connection, within the UK bank-feed service described by Finextra. Check what arrived rather than assuming the reconnect repaired everything.
A CSV export is usually the cleanest manual route because you can inspect and adjust transaction rows before uploading. A PDF conversion adds another checking stage: descriptions can wrap across lines, page headers can become transactions and amounts can land in the wrong columns.
For card accounts, use settled transactions, not the pending activity displayed in the banking app. A pending authorisation may change or disappear before the final charge posts.
Practical rule: Select the smallest complete missing period you can prove from the bank's records.
Keep the statement alongside the transaction export. The export supplies the rows; the statement supplies the account identity, period and balances you'll use to check the result.
How to Import a Bank Statement Into Xero, Step by Step
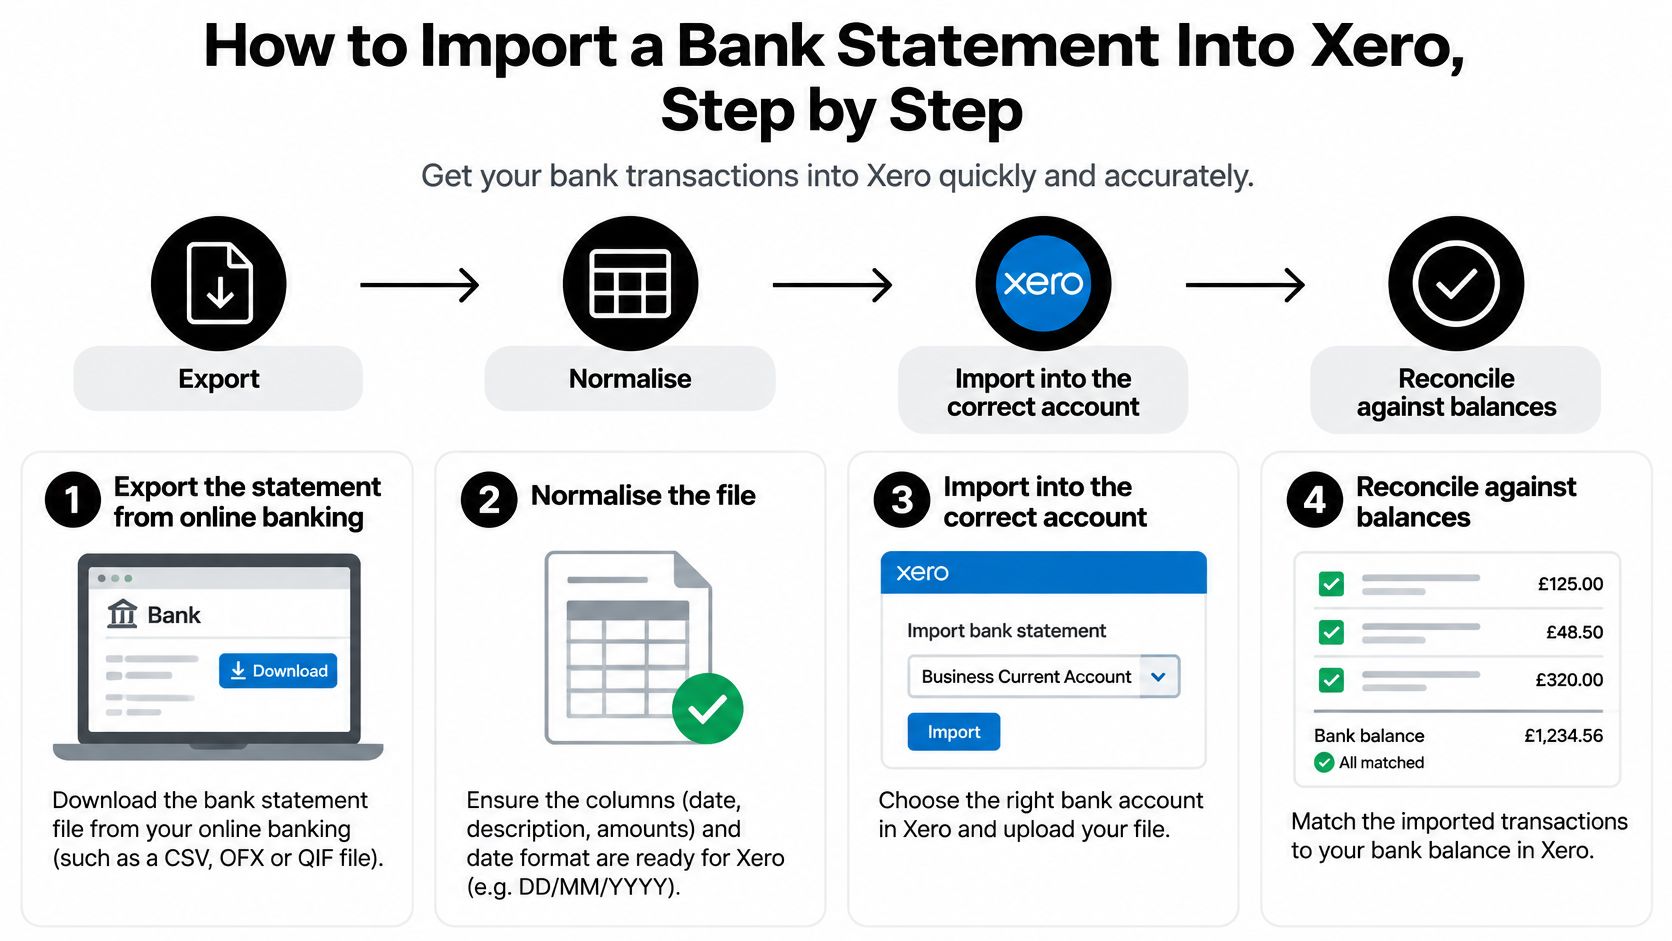
Use this workflow: export, normalise, import into the correct account, reconcile against balances. Xero's bank-connection guidance supports manual uploads where feeds aren't available, allows CSV adjustments before import and states that duplicate transactions are automatically excluded.
That duplicate handling is useful, but it isn't permission to upload an unchecked file. You still need to know which transactions belong in the account.
The workflow keeps file preparation separate from ledger checking.
Establish the starting position
Before uploading, write down the statement's opening balance and compare it with the prior reconciled closing balance for that bank account. If they differ, investigate the missing or duplicated period first rather than adding more activity on top of an unexplained difference.
An opening balance isn't another payment to add to the CSV. It's your starting control figure for the period.
Export the exact period from online banking. Download CSV where available, retain the supporting statement and save the original export untouched. A fresh download with a clearly selected date range is safer than editing an old spreadsheet whose coverage is uncertain.
Normalise a working copy. Keep each transaction on its own row, with a consistent date, description and amount structure; remove bank title lines, summaries and totals that aren't transactions. If the export separates money in and money out, preserve that distinction until you've deliberately mapped or converted it.
Open the correct bank account in Xero. Check the account identifier and currency, then use the statement-import option from that account's transactions area or account menu. Similar account names aren't enough, particularly where a business holds several current accounts or cards.
Upload and map the columns. Assign Date, Description and Amount, or the appropriate separate debit and credit fields offered by the importer. Confirm the date interpretation against the actual export, using DD/MM/YYYY where that's the bank's format.
Test the preview against known transactions. Find a supplier payment and confirm it appears as money out, then find a customer receipt and confirm it appears as money in. Check the first previewed transaction against the statement, because a plausible-looking preview can still use the wrong signs or dates.
Complete the import and record its scope. Save the exact uploaded file and note the account, date range, transaction count and control balances. Record any excluded lines so a difference in counts has an explanation rather than becoming a mystery later.
Move straight to reconciliation. Match the imported statement lines to existing invoices, bills, transfers or correctly recorded transactions before starting unrelated work in that account. Otherwise, you risk creating fresh bookkeeping entries for payments already recorded elsewhere.
Confirm what arrived
A clean result means the imported transaction count agrees with the prepared export, after any explained exclusions. The first and last transactions should also agree with the intended statement period.
Keep separate legal entities separate throughout this process. If you're preparing books while planning to set up a limited company in Ireland, Chern & Co's formation resource is relevant to that setup work, but the practical import rule remains unchanged: establish which company owns the account before selecting its Xero organisation.
Don't correct an entity mistake by renaming a bank account. Stop and resolve where the records belong.
Fixing Column Mapping and Format Errors
A UK date read in US order is particularly awkward because the import may succeed. A date intended as the third of April can become the fourth of March, placing a genuine payment in the wrong accounting period without producing an obvious error message.
Check the preview against dates you can identify unambiguously. Don't rely entirely on the spreadsheet's display format, because changing how a cell looks doesn't always change the underlying value exported to CSV.
Import errors, causes and fixes
| Error | Symptom | Cause | Fix |
|---|---|---|---|
| Day and month swapped | Dates land in the wrong months or fail to import | DD/MM/YYYY read as MM/DD/YYYY | Reformat dates to DD/MM/YYYY before upload |
| Debit and credit reversed | Payments show as money in | Amount columns or signs mapped the wrong way | Test one known payment and remap the column |
| Duplicate date range | Same transactions appear twice | Overlapping period imported earlier | Remove the overlap and import the new range only |
| Garbled symbols | Pound signs or accented names show as odd characters | File saved in the wrong encoding | Re-save the file as UTF-8 CSV |
| Header or total rows | Import fails or text is read as transactions | Bank added title or summary lines | Delete all rows above the first transaction, retaining a valid column-header row where required |
Fix the structure before the bookkeeping
Use Excel's import tools or a spreadsheet application's explicit text-import settings rather than repeatedly opening and saving the CSV by double-clicking. That gives you control over date interpretation, delimiters and encoding.
For a signed amount column, payments should reduce the bank balance and receipts should increase it. Don't reverse an entire column merely because the first negative value looks suspicious; identify the transaction on the bank statement first.
A running-balance column is not the transaction amount. Mapping it as Amount can produce a file full of valid numbers that bears no relationship to the money that moved.
The guide to CSV bank-statement formatting is useful when you need to inspect the file layout before another upload attempt.
A preview is a test screen, not a formality. If a known payment is wrong there, stop before importing.
If you find overlapping rows in a file that hasn't been uploaded, remove them from the working copy. If they're already in Xero, identify the incorrect imported lines before deleting anything; another upload won't repair the existing duplication.
Make every correction to a copy. Keep the bank's export intact so you can distinguish an original bank value from something changed during preparation.
Checking Balances and Reconciling After the Import
A successful upload proves that Xero accepted the file, not that the account is correct. Work through the control checks before accepting suggested matches or creating transactions.
Post-import balance and reconciliation checks
| Check | Expected result | If it fails |
|---|---|---|
| Opening balance | Matches the prior reconciled closing balance | Look for a missing or duplicated period |
| Closing balance | Matches the bank statement closing balance | Compare line by line and check the sign of each row |
| Transaction count | Matches the number of transaction lines in the export | Check for skipped transactions, repeated headers or blank rows |
| Date range | Starts the day after the last complete imported period ends | Remove the overlap and reimport only the necessary affected rows |
| Bank charges and interest | Recorded as transactions and reconciled | Add missing bookkeeping entries against the statement lines and reconcile again |
The date-range check concerns coverage, not whether a transaction exists every day. An account can legitimately have days with no activity.
Use the difference to direct the investigation
If the closing balance differs by the value of a payment, look for an omitted or duplicated transaction. A sign reversal creates a difference equal to twice that transaction's value, because the amount has increased the balance instead of reducing it.
If a whole stretch of activity is absent, inspect the export boundaries and feed coverage. If the transaction count is short, compare the source and uploaded file around blank rows, page breaks and repeated headers.
Xero's bank-feed explanation distinguishes bringing bank activity into the accounting system from reconciling it. A connected account still needs that review, just as an uploaded statement does.
Match the business event, not merely the amount
A supplier payment should normally match the bill already recorded, not create another expense. An internal transfer should connect the relevant accounts rather than become income in one and an expense in the other.
Payment-provider settlements need particular care. Sambapay's guidance on how to handle refunds and chargebacks during reconciliation is useful when a bank deposit represents sales less deductions rather than a straightforward customer receipt.
For the matching process within the ledger, use the Xero reconciliation walkthrough. Keep unexplained items visible instead of forcing a match to clear the screen.
Completion test: Save the checked balances, transaction count and covered period, with a short explanation of every unresolved difference.
Bank charges and interest need their own accounting treatment. If their statement lines are already imported, record or match the corresponding bookkeeping entries rather than importing the bank movement again.
Avoiding Duplicates and Keeping an Audit Trail
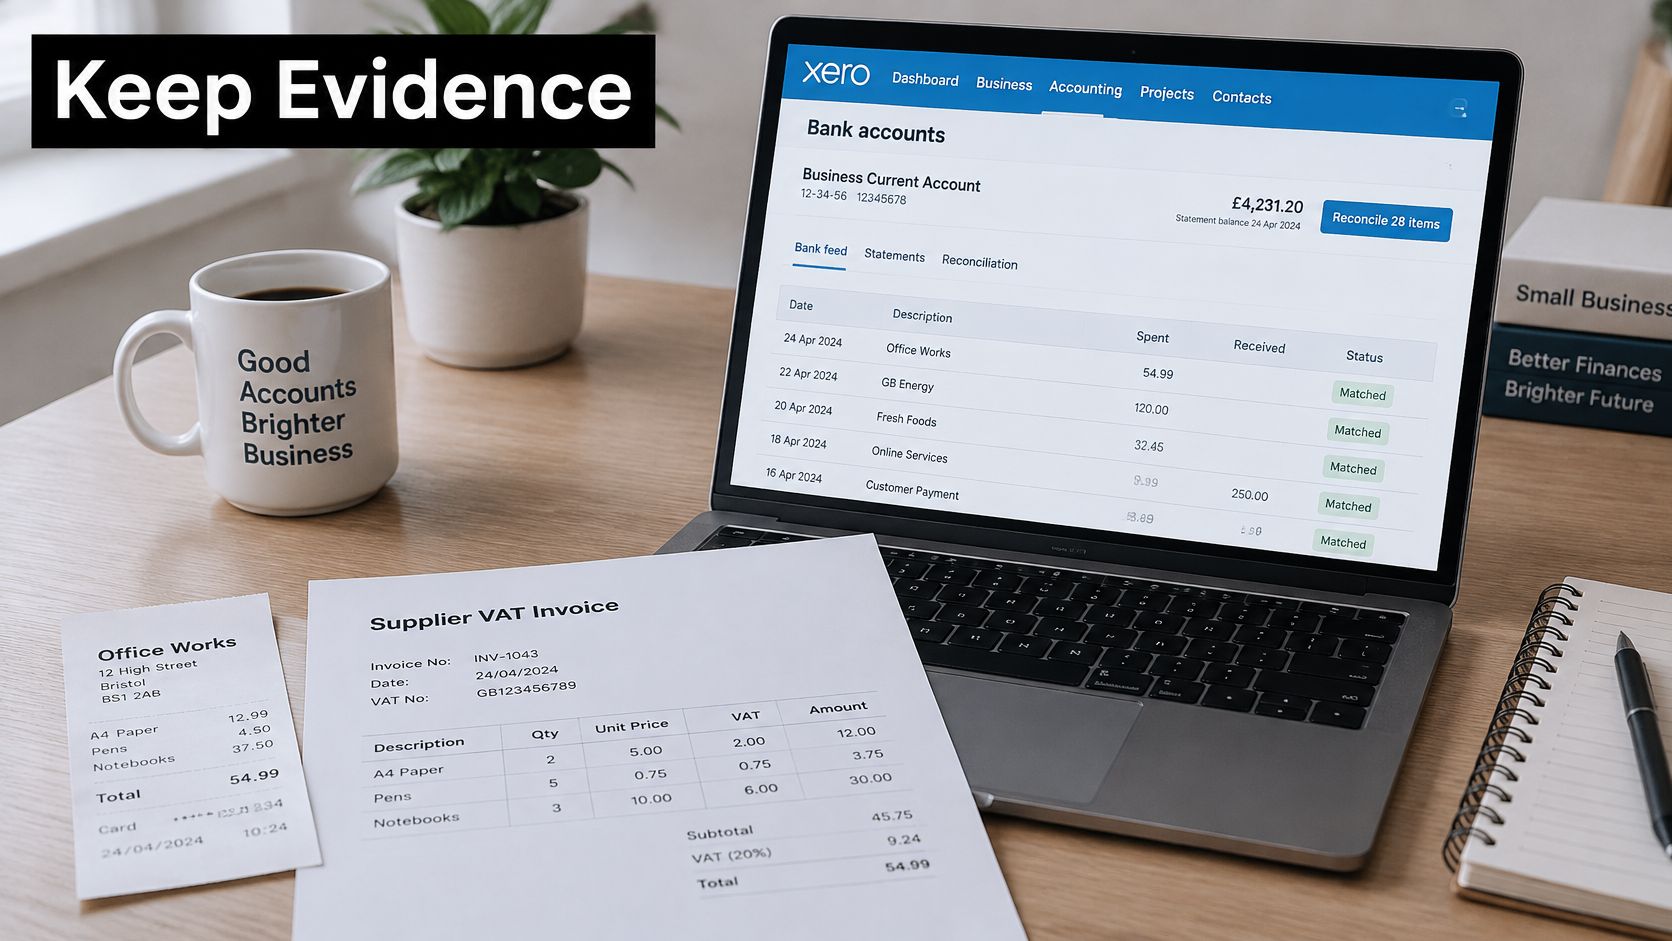
A clean ledger isn't necessarily a well-supported ledger. A bank line confirms a movement of money, but it doesn't by itself establish the business purpose, valid VAT treatment or supporting supplier invoice.
Keep payment records and purchase evidence together for review.
The Open Banking Limited impact report reported 13.3 million active UK users, including consumers and small businesses, by March 2025. Wider use of connected banking doesn't remove the need to document manual backfills or preserve the evidence behind transactions.
Keep a usable evidence pack
- Original bank records: Retain the untouched export and statement, clearly labelled by account and covered period.
- Uploaded version: Save an unchanged copy of the file you imported, separate from later working versions.
- Exception log: Record each correction, its date, the affected row or reference and the reason for changing it.
- Transaction detail: Preserve the description, counterparty, payment reference, currency and payment date wherever available.
- Purchase evidence: Associate invoices and receipts with the reconciled transaction, and record the business purpose where it isn't obvious.
Mixed business and private purchases need an explained allocation. A refund needs its connection to the original purchase; a grouped card settlement needs the underlying sales and deductions rather than an unsupported income posting.
For overseas purchases, retain the original-currency document and review the VAT treatment separately. The bank's converted sterling amount doesn't settle the tax question.
Receipt capture through WhatsApp, email forwarding or file upload can help collect that evidence. Capturing the document still needs to be followed by matching it to the correct payment.
The video below provides an additional visual reference for the workflow.
Reverse a bad import precisely
Record the affected batch, account and date range before removing anything. Identify only the statement lines introduced by the faulty import, not every transaction sharing those dates.
If lines have already been reconciled, review their linked bookkeeping entries and undo the affected reconciliation appropriately before removal. Don't delete valid bills, invoices or feed lines as collateral damage.
Then import the corrected file and repeat the control checks. Import the fields the software needs, but preserve a separate evidence trail for every material transaction.
Deciding When to Move From Manual Imports to Feeds
Move an account to a feed when the connection is available, the incoming history is complete and someone will monitor it. Don't switch merely because downloading CSV files feels old-fashioned.
The trade-off is practical. Manual imports give you a deliberate review point and a defined batch, but someone must obtain and prepare the file. Feeds remove that recurring download task, but someone still has to notice a disconnected account or missing activity.
Assign a route to each account
Keep a simple account register rather than making the decision afresh at every month end.
- Connected and current: Use the feed for ongoing activity and check its latest posted transaction against online banking.
- Unsupported account: Keep a scheduled CSV process with a named person responsible for obtaining the export.
- Older missing history: Complete a bounded manual backfill, with clear start and finish dates.
- Interrupted connection: Establish the missing coverage before deciding whether reconnection alone is sufficient.
- Closed or dormant account: Obtain the final statement and confirm whether any residual charges or interest remain.
The guide to Xero bank feeds can help with the connection side of that decision. The bookkeeping decision is narrower: which route supplies a complete, verifiable record for this account?
Control the handover
Before activating a feed, record the final manually covered date and inspect the first period the connection will retrieve. Set the feed's start date where the connection permits, and review any retrieved overlap before accepting or reconciling it.
Don't run an automatic file-upload routine alongside a live feed without a defined boundary. That creates competing sources for the same activity and makes later investigation unnecessarily difficult.
Set a monthly reconciliation date for the whole business. On that date, obtain statements for manual accounts, confirm connected accounts are current and record each account's reconciled position.
Keep the register specific: account identifier, owner, import route, last covered date and unresolved issue. If an account remains on CSV, write down why so another bookkeeper won't connect it casually and retrieve an overlapping period.
Automation is worthwhile when it reduces preparation without reducing oversight. A dependable hybrid process is better than forcing every account onto the same route.
Snyp captures receipts and related documents from WhatsApp, forwarded emails or direct uploads, extracts their details and syncs structured expense information to Xero. Visit Snyp to organise the supporting evidence for your imported bank transactions, then match those documents during reconciliation rather than treating the bank line as the whole record.