




How to Submit an Expense Claim in Xero: A Practical Guide

You've got a wallet full of receipts, a half-finished spreadsheet, and an accountant asking which purchases were personal and which belonged to the business. The problem isn't finding the expense claim in Xero button. It's making sure every claim has the right date, category, VAT treatment, evidence and reimbursement trail before month end.
A reliable workflow captures receipts as soon as they arrive, sends claims through approval and keeps personal spending clearly separated from company transactions. That approach reduces rework and gives your accountant records they can review.
Why Expense Claims Matter Beyond Data Entry
End-of-month expense processing often starts innocently. A director remembers paying for software personally, an employee forwards a blurred parking receipt, and several paper invoices appear in a coat pocket. Someone then enters everything into Xero from memory, hoping the dates and VAT details are correct.
That manual approach carries a real time cost. Xero's UK expense-management guidance says processing 10 expense claims manually takes over three hours. The same guidance connects expense handling with HMRC record keeping, including retaining receipts and invoices for at least five years after the relevant 31 January submission deadline.

The accounting entry is only one part of the process. When a director or employee pays a business cost personally, the claim records company expenditure, supports VAT treatment where applicable and creates a reimbursement obligation. If the claim is incomplete, the business may struggle to explain the transaction later, even if the amount itself is legitimate.
The evidence matters as much as the category
A receipt should show what was purchased, when, from whom and for how much. A note such as “client meeting” may not be enough to explain the business purpose, particularly if the receipt covers mixed personal and business spending.
For a practical refresher on sorting costs before entering them, BankStatementWizard's expense categorisation tips can help you distinguish common business expense categories and reduce guesswork in Xero.
Practical rule: Treat every claim as a small audit file. The receipt proves the purchase, the category explains the accounting treatment, and the note explains the business purpose.
The wider workflow matters because receipts, approvals, bills and payments must agree. Guidance on small business expense management is useful for putting that discipline into a repeatable routine rather than relying on an end-of-year clear-out.
Creating and Submitting an Expense Claim on Desktop
Desktop is usually the better place for detailed expense work. You have more room to check the supplier, account code, VAT rate, tracking information and supporting document before submitting the claim.
Enter the claim in the right order
Open Xero's Expenses area and choose New Expense Claim. Complete the core fields carefully:
- Date: Use the purchase date shown on the receipt, not the date you remembered entering it.
- Supplier: Select an existing supplier where appropriate, or create a consistent supplier record.
- Category: Choose the account that reflects the underlying cost, such as travel, office costs or professional services.
- Amount and VAT: Enter the transaction value and VAT details that the receipt supports.
- Business purpose: Add a short note that tells the reviewer why the cost belonged to the business.
Attach the receipt before submission. Xero workflows can accept common file formats such as JPEG, PNG and PDF, and supported email-forwarding arrangements may let you send documents directly into the system. Check that the image is readable, including the supplier, date, totals and VAT information.
Submit, don't just save
A draft claim isn't part of the completed approval trail. If the details are ready and the approver is available, submit the claim rather than leaving it in drafts. Reviewers can then see the receipt and business explanation together.
For a director or employee who paid personally, UK accounting guidance says the claim should include the receipt, amount and VAT where applicable, then be submitted for approval. Once approved, Xero creates a bill, with reimbursement commonly tracked through the Director Loan Account, as described in this UK explanation of recording personally paid costs.
That sequence prevents a common mistake: recording the expense in the profit and loss account while forgetting the amount still owed to the person who paid.
Submitting Expense Claims via the Xero Mobile App
Mobile capture works best when the receipt is still in your hand. Open the Xero app, go to Expenses and select New Expense Claim. Photograph the receipt in good light, check the captured details and complete the remaining fields before submitting.

The mobile form is simpler than the desktop view, but the accounting requirements don't change. You still need the date, supplier, amount, category, VAT treatment where relevant and a clear business reason. A photograph saves time only if the image is legible and the extracted values are checked.
Capture immediately, review later
Contractors, field workers and travelling business owners benefit most from a snap-and-submit routine. It stops receipts disappearing into a vehicle, wallet or email inbox, and it avoids reconstructing a month's spending from bank transactions.
If a receipt arrives by email, use a connected forwarding workflow where available instead of retyping every field. That preserves the original document and reduces transcription mistakes, but automated extraction still needs a human check.
A quick capture is useful. A quick capture that nobody reviews can simply move the error further down the process.
Use mobile for speed and desktop for oversight. Later, review submitted claims on a larger screen, correct categories, confirm VAT details and make sure the business purpose would make sense to someone who wasn't present at the purchase.
The strongest routine is not “mobile or desktop”. It's mobile capture at the point of purchase followed by regular desktop review.
How Approvals and Reimbursements Work in Xero
Approval is the control point between a submitted claim and an accounting entry you're prepared to stand behind. A claim waiting for approval may be visible to users, but it hasn't completed the process. An authorised reviewer should check the receipt, business purpose, category and VAT treatment before accepting it.
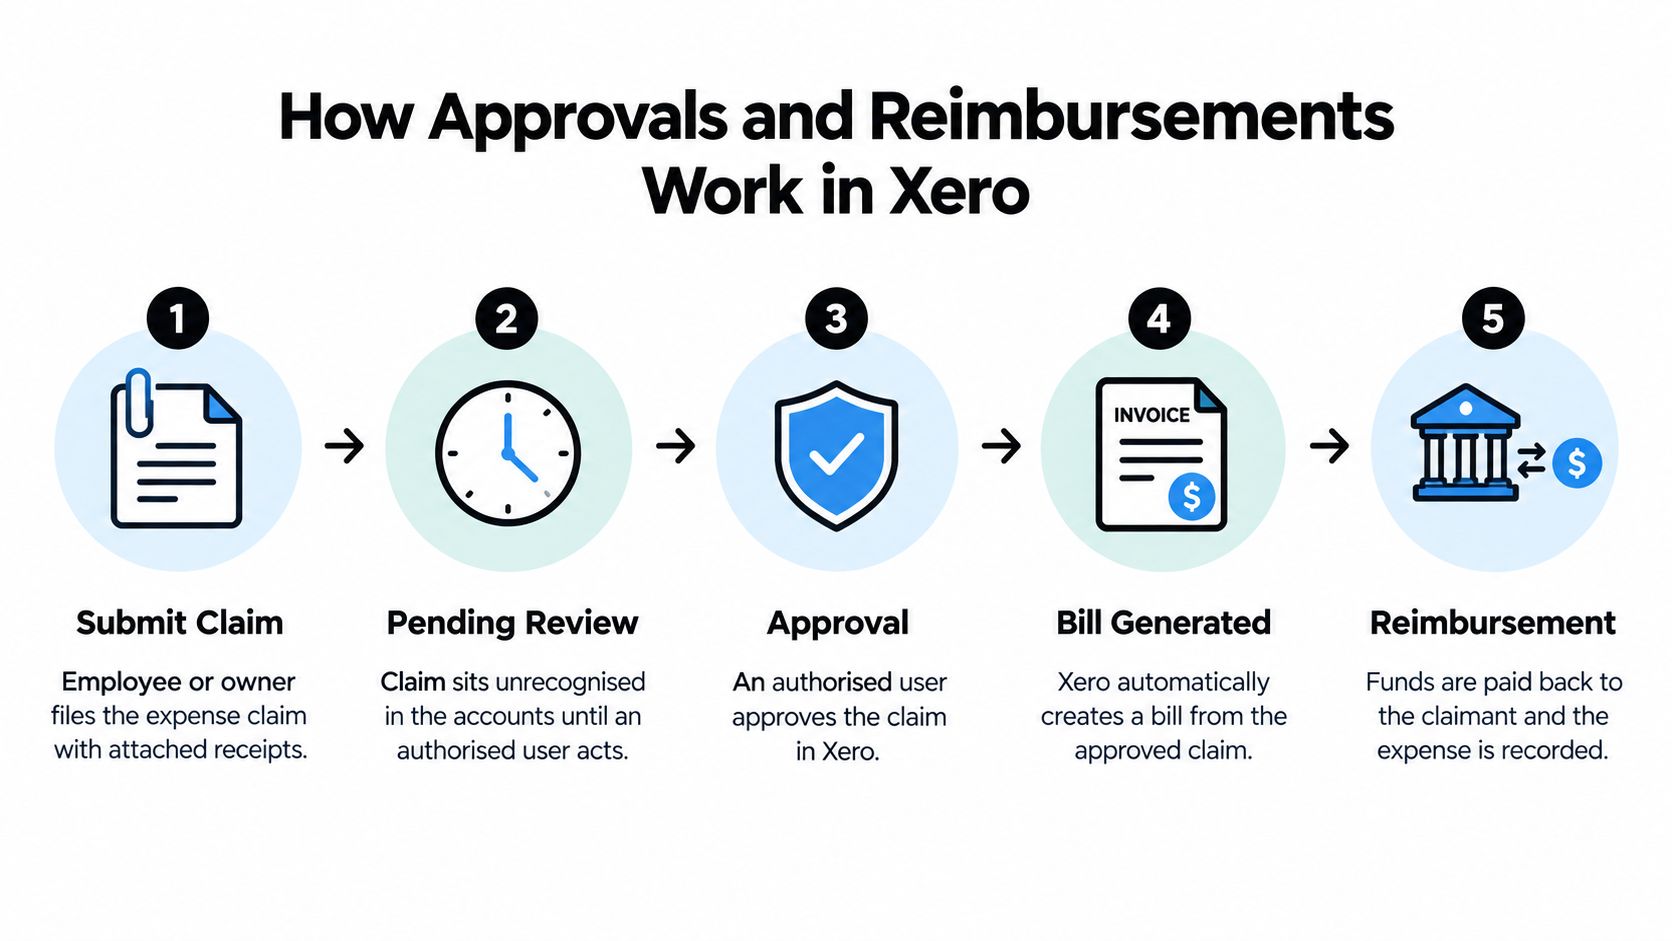
Once approved, Xero creates a bill from the claim. That bill provides the accounting record to match against the eventual payment, while the reimbursement position shows what the director or employee is owed. The approver should be someone with authority to assess whether the cost was for the business, not just the person who entered it.
Why timing changes the quality of the records
Monthly submissions are easier to check because the purchase is still familiar and the receipt is easier to interpret. They also help keep the Director Loan Account accurate when a director regularly pays business costs personally.
Year-end submissions that reach back 12 months are harder to verify, according to UK accounting guidance on personally paid costs. A forgotten receipt may lack context, a supplier may be difficult to identify and the reimbursement balance can become misleading.
Set a regular review date and make responsibilities explicit:
- Claimant: Captures the receipt and explains the business purpose.
- Approver: Checks the evidence, category and policy treatment.
- Bookkeeper or accountant: Reviews coding, VAT and outstanding balances.
- Business owner: Confirms payment and reimbursement records agree.
For broader context on reimbursement controls and policy design, Zaro's expense reimbursement guide offers a useful comparison point, although UK businesses still need to apply their own accounting and HMRC requirements.
A clean approval process should leave a clear chain from receipt to claim, claim to bill and bill to payment. The expense approval process guide provides further practical context for assigning that responsibility in a small team.
Practical Tips and Automating with Snyp
The largest avoidable bottleneck is usually not approval. It's getting receipts into one place before somebody starts typing from memory. Receipts scattered across WhatsApp, email, wallets and glove compartments create duplicate work and make it harder to identify what is missing.
Use a simple capture policy:
- One destination: Give staff a defined place to send receipts.
- One naming habit: Keep supplier and purchase details visible rather than renaming files inconsistently.
- One review rhythm: Check captured documents before claims accumulate.
- One owner: Assign responsibility for resolving unreadable images or missing VAT details.
Xero's native workflow can suit a small business where claim volumes are manageable and reviewers work closely with the people spending the money. It becomes less comfortable when the business receives documents through several channels or when the person entering the claim has limited context about the correct category.
Where an automation layer helps
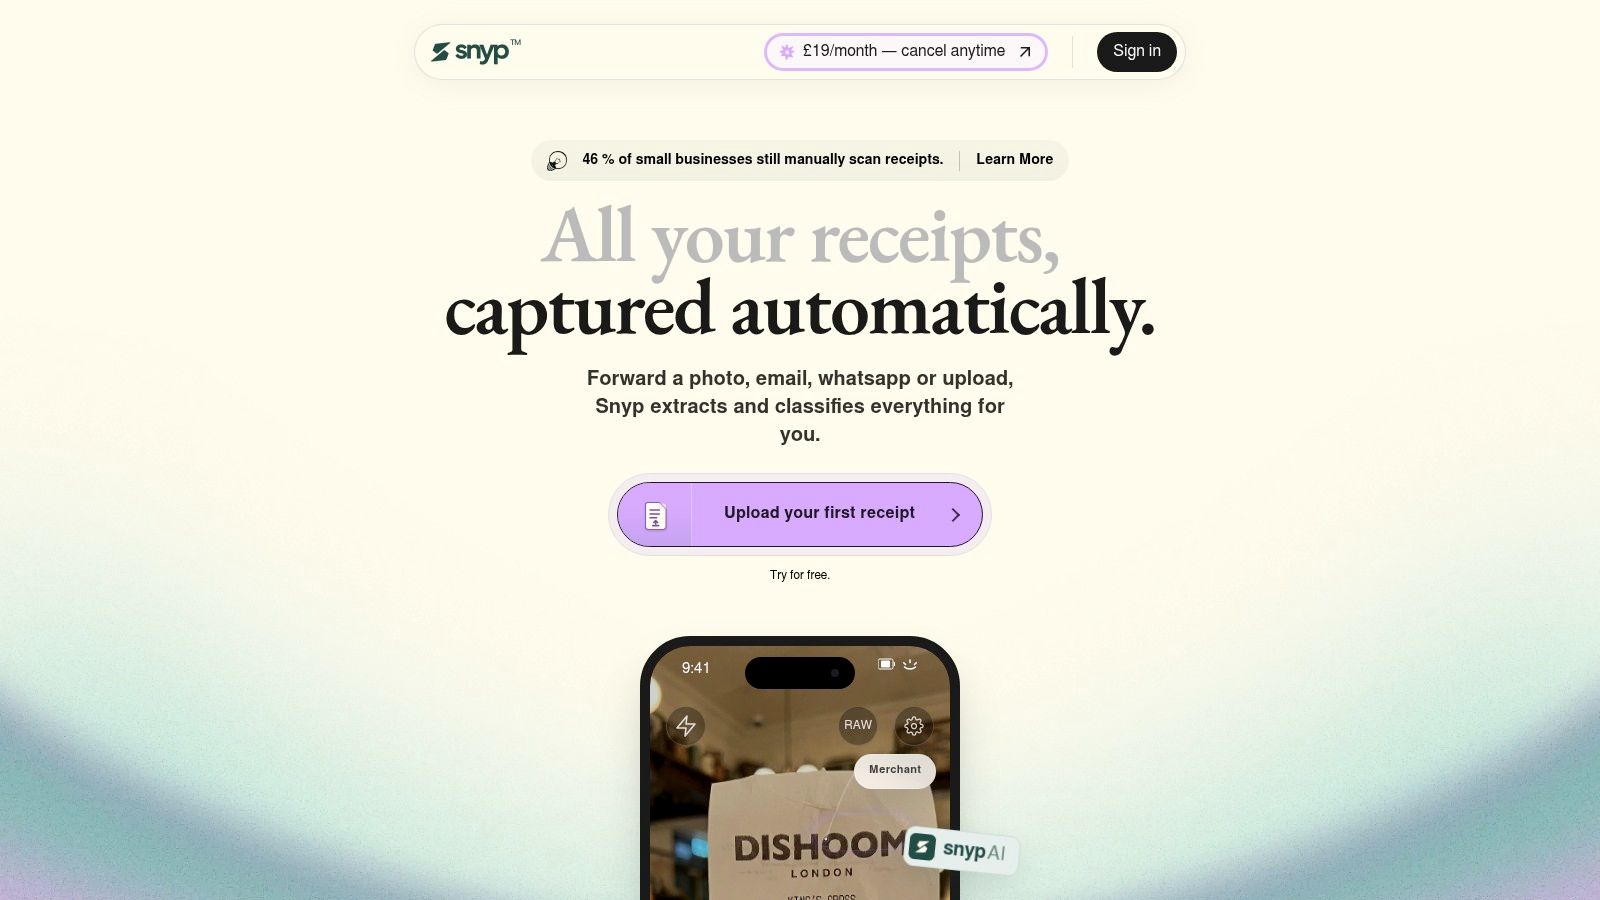
Snyp is one option for centralising receipt intake. It accepts receipts through WhatsApp, email forwarding and direct file upload, including JPEG, PNG and PDF files. Its workflow extracts information such as merchant, amount, date, tax, currency and category, then sends structured data to accounting platforms including Xero for review and reconciliation.
The important control remains in place: automation prepares the record, but a person should still check unusual transactions, mixed-use costs and uncertain VAT treatment. A tool shouldn't decide whether a journey was allowable merely because it can read the receipt.
Businesses considering Snyp should review its current Xero integration workflow against their approval responsibilities and document-retention procedures. The practical test is whether it reduces duplicate entry without weakening the evidence attached to each transaction.
Common Errors and Compliance Pitfalls
The most dangerous assumption is that a valid purchase automatically makes a valid claim. HMRC may challenge records that lack sufficient detail or were submitted too far after the transaction, so a receipt image without context isn't a complete control.
The UK guidance on self-employed allowable expenses reinforces the need for proper records and notes that receipts and invoices should be retained for at least five years after the relevant 31 January deadline. That requirement is particularly important for sole traders and directors who pay personally, because the business must be able to connect the personal payment with the company cost.
Correct the failure at its source
Missing receipt: Ask for the document before approval. If it cannot be obtained, record the circumstances clearly and ask the accountant how to treat the item.
Vague description: Replace “expenses” with a useful explanation, such as the purpose of a client meeting or the business reason for a journey.
Incorrect VAT: Don't assume every supplier receipt supports VAT recovery. Check that the document contains the required information and that the business treatment is appropriate.
Personal and business mileage mixed together: Separate business journeys from ordinary commuting and review parking, tolls, fuel, home-working and hybrid arrangements individually. Xero's mileage functionality can capture a journey, but it can't make the tax policy decision for you.
Claims left untouched: An old queue makes approval less reliable. Review claims regularly, resolve exceptions promptly and avoid allowing a backlog to become the normal process.
Automation removes repetitive typing. It doesn't remove the need to decide what is allowable, what must be apportioned and what evidence needs to remain available.
Keeping Your Expense Workflow Clean and Compliant
A dependable workflow is deliberately uneventful. Capture the receipt when the purchase happens, enter the claim while the details are fresh, attach the evidence, submit it, approve it and match the resulting bill to reimbursement.
Use each tool for the job it handles best:
- Mobile: Capture receipts while travelling or away from the desk.
- Desktop: Check categorisation, VAT and supporting notes in detail.
- Automation: Reduce repeated typing and consolidate documents from different channels.
- Monthly review: Keep approvals, reimbursements and the Director Loan Account current.
- Document storage: Retain receipts and invoices for the required period and avoid unnecessary backdating.
The right process protects more than tidy bookkeeping. It gives your accountant a defensible record, makes reconciliation easier and prevents a personal payment from disappearing into the wrong account. Xero can handle the accounting workflow effectively when the input is timely, complete and properly reviewed.
Snyp captures receipts from WhatsApp, email and file uploads, extracts the details needed for Xero and sends structured records into your review workflow. Visit Snyp to see how it can reduce manual expense entry while keeping receipt evidence attached to the claims your business needs to reconcile.